Are annoying neighbors, barking dogs, crazy storms, or oncoming traffic bugging you a ton? I have definitely been there. As someone who hates noise and has extra plasterboard lying around, I have looked into the effectiveness of soundproofing walls with plasterboard.
Insulated (also known as acoustic) plasterboard is soundproof due to the high-density material and mass compared to other forms of plasterboard. Be sure to apply the insulated plasterboard thoroughly to soundproof your space the best.
We will go more into depth by going over everything you need to know about insulated plasterboard. Then, we will discuss how to install the plasterboard, and what to use to make your project successful. Lastly, we will go over some alternative options to soundproof your space!
What You Need To Know About Insulated Plasterboard
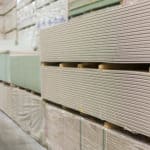
- “Insulated plasterboard is a commonly used building material, which consists of a sheet of standard plasterboard or gypsum board, and a sheet of insulating material sandwiched together into a single sheet.” Source
- “It is available in a variety of sizes and thicknesses, with a choice of finish and material used for the insulation.” Source
- Insulated plasterboard usually takes about 30 minutes to an hour to install, depending on the brand of insulated plasterboard that you use.
- Installing insulated plasterboard professionally takes on average $30/hour.
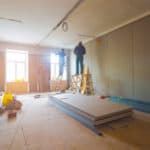
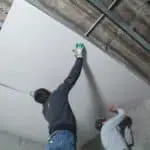
How To Install Insulated (Acoustic) Plasterboard
Here are some steps that I found directly from an installation company on how to install insulated plasterboard.
- “Mark spots on masonry and ceiling to establish the new wall plane.
- Make 1200mm marks vertically on the wall to indicate the position of the boards.
- Start installing from an internal corner or a window or door reveal.
- Make a continuous bed of adhesive around the perimeter of the wall and around services/openings to take into account building airtightness.
- Cut the board approximately 15mm short of the floor to ceiling height and position it with the bottom edge resting against packing strips.
- Apply a dab of adhesive to the wall (each dab of adhesive should be around 750mm x 250mm, covering 20% of the board area).
- Tap the boards into position with a straight edge and check the alignments with the markings made earlier.
- Lift the boards to the ceiling edge and support them until the adhesive has been set.
- Nail in fixings at the mid-point of the board around 25mm from the edge.
- Butt all other boards close together and fix these using the same technique.” Source
Best Overall Insulated Plasterboard
- Quiet Rock Plasterboard– Quiet Rock is a popular option because it was one of the first insulated plasterboards with soundproof qualities. The setup is very low maintenance and it is only 1/4 inch thick.
- CertainTeed Plasterboard– CertainTeed comes with a width of 5/8 inches and still has a very high rating in terms of how soundproof it is (right below Quiet Rock’s plasterboard).
- Gold Bond Plasterboard- This plasterboard is definitely the most affordable option out of the three, with only $20 for a set of drywall.
How To Soundproof Through Additional Drywall
Additional drywall is definitely not the best or easiest way to soundproof your home. As you can tell by the terminology in these steps, soundproofing through additional drywall is not for beginner builders.
This is because drywall that is not specially designed for soundproofing instances is usually very thin and light.
However, many do find using additional drywall to be the easiest and most cost-effective solution to their needs, depending on each home’s circumstances. To add to this, here is a step-by-step method on how to install additional drywall!
- Decouple the stud wall by creating another stud wall, creating two staggered stud walls that are spread out amongst each other, or by using soundproofing clips.
- Isolate the studs themselves. This will reduce the amount of impact noise in your home. You will need to buy some rubber feet to stabilize the stud wall while you do this step.
- Insulate the wall cavity. “The purpose of insulation isn’t necessary to add mass, although this does help. It’s primarily to prevent resonance by reducing sound amplitude as it passes through the fibers. That is why the insulation has to be loose (with low density).” Source
- Add mass to the wall through more plasterboard. Mass-loaded vinyl or vehicle sound deadening mats can also work well in case you are running low on drywall. Source
Best Ways To Soundproof Your Home
Does plasterboard just not work for your home or you would rather not go through the hassle of installing it? Here are the top eight options of how you can soundproof your home effectively.
- Insulated Plasterboard
- Fiberglass Insulation– Fiberglass Insulation has a very useful structural property, with air holes where sound can be trapped. Be sure to remove any mechanical connections due to studs before installing this type of installation. Fiberglass insulation usually costs around $.09 to $1.09 per square foot. Source
- Green Glue Damping Compound– This material helps you save money and space through spraying as opposed to applying the material on. This material usually costs around $.50 per square foot.
- Soundproofing Clips for Decoupling-These materials clip onto the existing installation to make the material denser, which makes it more soundproof. This material costs around $50-100 for a set of these clips.
- Solid Core (Material) Doors– You can easily soundproof the front of your house drastically by soundproofing your door. Doors are usually the least dense part of the front of your home, so getting a more durable door can be very effective. Soundproof doors can be very pricey, ranging from $500-$4,000
- Soundproof Door Seals-Another way to make your space more soundproof is by eliminating any seals allowing extra noise in. It eliminates a lot of extra space but it is a good soundproof option. These seals cost around 9-50 dollars, depending on the size you need.
- Soundproofing Sealant-For those who live in a used home, an older sealant may allow a lot of extra noise. Updating your sealant with sound-proof qualities usually costs around $7-15
- Soundproofing Putty Pads– These pads, usually applied within insulation, costs around $30-90. Source