Plasterboard is known as one of the United States’ most popular home improvement tools. How long does this notorious board last?
Plasterboard typically does not go out of date on its own. Plasterboard durability depends on the wall structure it was applied to, the amount of wear and tear, and how well the plasterboard was applied.
We will talk about plasterboard more in-depth, the positives and negatives of America’s favorite sheets, and talk about using drywall instead of using plasterboard. Lastly, we will give a simple guide on how to put up plasterboard on your wall.
What Is Plasterboard?
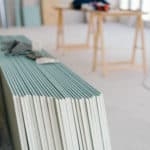
“Plasterboard is basically an inner layer of gypsum sandwiched between two outer layers of lining paper including various additives in the gypsum layer and varying the weight and strength of the lining paper, will give the finished board different properties” Source
It is a board-like material, hence the name (so don’t get confused between its liquid form, plaster).
Positives About Plasterboard
- Plasterboard is very durable and has the capability to last a long time if you use the materials well. A friend of mine actually stated that he just saw some plasterboards that have lasted over 800 years! Source
- Plasterboard has a lot of decorative designs and styles that you can be able to choose from which gives you a wide variety to choose from. Source
- Plasterboard is very soundproof in airborne environments, such as playing music or dealing with loud sounds (outside traffic, loud television, etc.) Source
- Do you play musical instruments or an avid movie fan? Look no further. Plasterboard is known to have the best acoustics to enrich your sound.
- Plasterboard is very versatile and can be used in many different home improvement projects.
- The plasterboard is a lot less messy. For example, drywall, the other popular option to plasterboard, tends to produce a lot of dust when cut or sanded. Plasterboard, on the other hand, doesn’t produce as much dust by any means. Source.
Negatives About Plasterboard
- The plasterboard is difficult to repair. Most just say that when plasterboard breaks, you might as well just completely replace it. This is different than other materials that you can easily repair/go over.
- Plasterboard costs a lot of money to buy and install. On average, plasterboard costs around 15,000 dollars to completely set up plasterboard “in three average-sized rooms”. Source
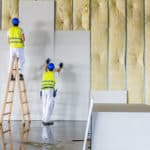
- Plasterboard is very labor-intensive due to the specific process in which you put it up. You will need to hire the best of the best for your project. Because installing plasterboard is a highly skilled art (if done well), laborers usually require more for the more peculiar nature of the project, which adds to the cost of the project. Source
Drywall Vs. Plasterboard (Yes, They’re Different)
What’s the difference?
- Plaster is more labor-intensive. Source
- Plasterboard costs more than drywall. Source
- It is much easier to hang items with drywall than with plasterboard. Source
- Plasterboard tends to be more soundproof. Source
- Drywall has better insulation. Source
- Plasterboard has more of a fine look to it than drywall. Source
- Plasterboard has a very smooth texture which makes things easy for other home improvement projects and aesthetics. Source
- Plasterboard does not react as well to extremely wet conditions. It is best to avoid it near bathrooms, near sinks, etc.
- Drywall is less expensive than plasterboard in the price of materials and labor. Source
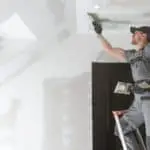
How To Put Up Plasterboard
I found a great guide to put up plasterboard well on a stud wall, taken directly from a popular home improvement magazine.
Most recommend using professionals to handle these types of projects as the material is a bit more labor-intensive to install, but for simple projects, this guide would be more than able to help you out.
Setting Up Plasterboard On A New Stud Wall
- “As a rule, each board should be positioned so that its edges are the center of the uprights and noggins. However, at door openings and adjoining walls, the plasterboard must fit tight up to the edges
- Start from the door opening and work towards the furthest wall. When measuring for a cut board, do so from the edge of a stud to the center of the noggin. With the board flat, use your tape measure, as a rule, to mark up
- Take your spirit level or straight edge and place it on the marks. Score a line along the intended cut using your Stanley knife, then stand the board up and give it a tap on the back to start the split
- Fold the split edge back on itself, then cut down the remaining paper with your knife. You should end up with a nice clean edge. If your cut is slightly overlength, use a plaster rasp to trim the board to size
- Offer the board up to the studwork, ensure it’s in the correct position. Drive a couple of screws into the edges of the board where you can see a noggin or upright – but only enough to hold the board in place
- Take your spirit level or straight edge and mark lines down and across your board at the center of the studs and noggins. This will help you to secure the plasterboard without missing the timber behind
- Place screws at about 100-200mm gaps along the lines you drew in step 6. Drive them in just enough so they break the surface of the paper. Don’t go too far, as this will crush the plaster and prevent a secure fix.
- Your end boards are likely to need cutting to length. Measure from the furthest edge to the center of the noggin to ensure a tight fit, then mark up, score, and split the board as described in steps 2–3
- Fit the remaining boards as described in steps 5–7. When placing end boards, try to keep the factory edges together – this will minimize any need for filling in the next stage of the project.
- If a board extends into an opening, it’s best to cut it in situ. Use the studwork as a guide to making the horizontal saw cut, before scoring and splitting the board vertically. Finish edges with a surform”